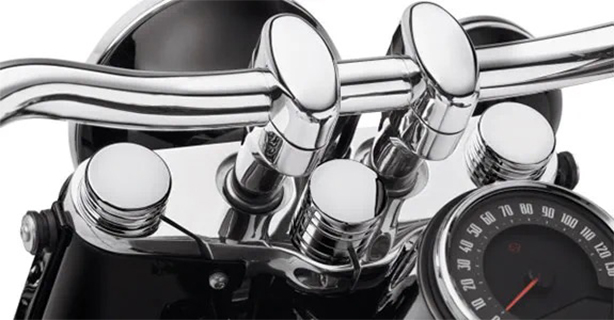
Whether you're cruising on a classic Harley-Davidson® or any other chrome-adorned motorcycle, maintaining that brilliant shine is essential for both appearance and longevity. In this comprehensive guide, we'll explore the history of chrome in motorcycling, delve into the intricate process of chrome plating, and provide you with expert tips on how to clean, polish, and preserve your bike's chrome components for years to come.
When you think of a Harley-Davidson® motorcycle, what sort of image comes to mind? If you're like a lot of people, there's a good chance it includes at least a little chrome.
THE STORY BEHIND THE HIGH-QUALITY CHROME ON YOUR H-D® MOTORCYCLE
Chrome-plated accessories first started appearing in Harley-Davidson® catalogs as early as 1930. The first was a “speedometer lamp,” designed to make your (optional) speedometer “as effective at night as in the daytime.” More chrome accessories appeared in subsequent years, with 1934 seeing the debut of the first “Chromium Plated Combination” package.
“For an extra $13.50,” explains Harley-Davidson Museum Curator Jim Fricke, “you got ‘chrome-plated Handlebars, Generator end cover, Exhaust pipes, Saddle bar assembly, Muffler, Tail pipe, Oiler and timer cover, Intake pipe clamp nuts, Valve spring covers, and Front brake control clamp.’”
In other words, everything you would need to trick out your ride in brilliant style.
Though the trend in recent years has moved toward a darker overall look, chrome accessories remain a staple of customizers everywhere. There’s nothing like it, after all, to add just the right amount of contrast to those flat black parts you just installed.
So, we asked:
Chrome was once king when it came to accessorizing a Harley-Davidson® motorcycle. What’s your preference – and why? Does chrome still rule, or is less really more?
Your answers:
“Chrome, baby, and lots of it! I want to be seen, not blend in with the highway!” –W.D.
“Black is for the tires. I’ve been riding since the ’70s, so I am generation chrome. Flashiest paint, long forks, and rigid frames rule. How can you show off on flat black?” –WES D.
“Chrome is, has been, and always will be king! Chrome, chrome, chrome – beautiful chrome! I have a 2003 100th Anniversary model Fat Boy® that has so much chrome that the color indicated on the registration is “chrome” with a little black trim!” –GREG
“I have a 2015 Road Glide® CVO™ with lots of chrome, and I also have a 2015 Dyna® Wide Glide® with a lot of black that is slowly changing as I replace black with CHROME!
Chrome sets things off. Just my opinion!” –RUSS L.
“Chrome to the bone, with two-tone paint and black leather bags. It’s a win-win!” –KARL H.
“Flat black draws a long glance, but chrome draws a glance, double-take, and a long look.” –GERRY B.
You may not realize, however, that chrome’s beauty is far more than skin deep. Yes, it adds cosmetic brilliance, but it’s also more durable and easier to take care of than polished aluminum or painted surfaces. This means less maintenance and more time for riding. No wonder it remains the most popular surface finish for Harley® riders.
HOW CHROME IS MADE
Chrome is short for chromium, a hard metallic element that resists tarnishing and corrosion. When highly polished, it shines like … well, chrome. It only takes a thin layer on a metal surface to accomplish that purpose, usually applied through a process called “electroplating” or chrome plating.
This process uses electricity to transfer metal ions from one metal surface (the anode, in electrical terms) – such as copper, nickel, or chromium bar – to the part to be plated (the cathode). Both the anode and cathode are suspended in a tank filled with a liquid solution called electrolyte.
Electroplating for Parts and Accessories is an extremely complex series of operations that includes dozens of critical steps. Achieving the desired results requires extensive metallurgical knowledge, years of experience, and complete control of all processes.
For example:
Parts must be polished carefully and be perfectly clean in preparation for chrome plating.
Voltage and amperage of the electrical current must be controlled to exact levels.
Every part to be plated requires specific plating operations to achieve premium results, depending on its composition. For instance, fork sliders are plated with copper, two types of nickel, and a unique chromium alloy.
Each process can be unique to a specific part. For instance, aluminum fork sliders and Tour-Pak® luggage racks are made of different metals and, therefore, require entirely different plating specifications.
THE GENUINE HARLEY-DAVIDSON® CHROME DIFFERENCE
The premium surface quality of H-D® chrome accessories is the result of extraordinary attention to detail, computerized operations, and proprietary processes. Take a closer look at some of these processes, using H-D Chrome Fork Sliders as an example.
1. The chrome supplier receives the fork sliders in a raw, machined condition from the Showa Corporation, a world-class manufacturer of premium suspension components.
2. Highly skilled buffers polish the raw, machined fork sliders to an incredibly smooth, blemish-free surface.
Uniquely shaped plastic plugs are inserted into the fork sliders to protect threaded holes and bores from plating contamination that would make assembly difficult or impossible.
Harley® chrome parts are batch plated (e.g., 32 fork sliders at once). This provides the highest level of control over processes, such as the position of the fork sliders and computerized control of all plating operations, including the electrical current, plating time, and electrolyte strength and temperature.
3. Specially designed plugs, racks, and plating processes isolate key points from plating and prevent damage.
Uniquely shaped plastic plugs are inserted into the fork sliders to protect threaded holes and bores from plating contamination that would make assembly difficult or impossible.
Harley® chrome parts are batch plated (e.g., 32 fork sliders at once). This provides the highest level of control over processes, such as the position of the fork sliders and computerized control of all plating operations, including the electrical current, plating time, and electrolyte strength and temperature.
Every Harley-Davidson® part must meet a detailed set of specifications regarding materials, dimensions, and tolerances that create a superior product. This ensures the consistent quality Harley® owners expect.
To make sure chrome parts consistently meet the very high standards set for H-D® Genuine Motor Parts and Accessories (P&A), extensive testing is conducted for five different parameters:
Corrosion: Parts are subjected to a 24-hour copper sulfate-juiced salt spray test (developed by the U.S. military) to verify corrosion-resistance in salty and industrial environments, such as those found in coastal areas.
Thickness: Too little electroplating and the appearance may suffer; too much and the plating material may become brittle.
Impact Quench: Tests for cracking resistance involve heating the part to operating temperature, then dropping it into room temperature water. The plating must not blister, crack, lift, or peel, which can allow moisture to corrode the base metal.
Adhesion: A test piece is cut with a fine-tooth band saw to verify that the plating is resistant to fracture and peeling.
Appearance: P&A must adhere to a series of very strict surface finish quality criteria and standards for brilliant chrome color for a perfect color match between Original Equipment (OE) and P&A chrome parts.
FORM, FUNCTION, AND FEELING OF CHROME
What it all comes down to is that you can always rely on Harley-Davidson® chrome parts to fit right, function as expected, and always be a perfect color match to any other Harley-Davidson chrome part. That makes show-quality customization as easy as visualizing the dream, making a selection, and installing the accessory. It doesn't get any better or any easier to create a brilliant custom motorcycle.
As Willie G. Davidson, Harley-Davidson Chief Styling Officer Emeritus, has long said, “Form follows function, but both report to emotion.”
Harley-Davidson® chrome parts and accessories fit this model beautifully, combining a brilliant form and finish with unbeatable functionality – to give you an unshakable feeling of pride.
HOW TO CLEAN AND POLISH YOUR BIKE'S CHROME ACCESSORIES
Chrome components require cleaning, polishing, and protection from the elements, especially if your motorcycle is operated near the ocean or on salt-treated roads.
However, polishing chrome vs. polishing a motorcycle involves distinct approaches due to the different materials and desired outcomes. Chrome polishing focuses on achieving a mirror-like finish using chrome-specific products to remove oxidation and prevent rust, requiring meticulous attention to detail to avoid scratches.
Materials Needed
Mild detergent or specialized motorcycle cleaner
Microfiber cloths
Chrome polish
Soft-bristle brush
Water hose or bucket of water
Wax (optional for added protection)
Gloves (optional for protection)
Steps To Clean And Polish Motorcycle Chrome
Step 1: Preparation:
Choose the Right Location: Select a shaded area to clean your motorcycle to prevent water spots and streaks caused by the sun drying the cleaner too quickly.
Gather Supplies: Have all your materials ready to avoid searching for items mid-process.
Step 2: Initial Rinse
Rinse the Motorcycle: Use a water hose or a bucket of water to rinse off loose dirt and debris. This prevents scratching the chrome during the cleaning process.
Step 3: Cleaning
Prepare Cleaning Solution: Mix a mild detergent with water or use a specialized motorcycle cleaner.
Wipe Down Chrome: Soak a microfiber cloth in the cleaning solution and gently wipe down the chrome surfaces. Focus on one section at a time to ensure thorough cleaning.
Use a Soft-bristle Brush: To avoid scratching the chrome, use a soft-bristle brush for hard-to-reach areas or stubborn grime.
Rinse Thoroughly: After cleaning, rinse the chrome parts with clean water to remove any soap residue.
Step 4: Drying
Dry with Microfiber Cloths: Use clean, dry microfiber cloths to dry the chrome surfaces thoroughly. This step is crucial to prevent water spots.
Step 5: Polishing
Apply Chrome Polish: Apply a small amount of chrome polish to a clean microfiber cloth. Follow the manufacturer’s instructions regarding the amount and application method.
Polish the Chrome: Rub the polish onto the chrome in a circular motion, working on small sections at a time. Apply gentle pressure to avoid scratching.
Buff the Chrome: Use a separate clean microfiber cloth to buff the chrome to a high shine. Ensure all polish residue is removed.
Step 6: Waxing (Optional)
Apply Wax: For added protection, apply a layer of automotive wax to the chrome surfaces. This helps protect against future tarnish and makes future cleaning easier.
Buff Again: Buff the waxed surfaces with a clean cloth to achieve a glossy finish.
Step 7: Final Inspection
Check for Missed Spots: Inspect the chrome surfaces to ensure all areas are clean and polished. Touch up any missed spots as needed.
Tips And Precautions
Avoid Abrasive Cleaners: Never use abrasive cleaners or rough materials that can scratch the chrome.
Regular Maintenance: Regularly clean and polish your motorcycle’s chrome to maintain its appearance and prevent corrosion.
Use Quality Products: Invest in high-quality chrome polish and microfiber cloths for the best results.
HOW TO CLEAN RUST FROM YOUR MOTORCYCLE’S CHROME
Signs of rust marks indicate that the protective chrome layer has been compromised. Following the steps listed above should help your chrome components stay shiny for a long, long time.
However, in the event you notice rust building, you can effectively clean rust from your motorcycle's chrome parts and prevent more severe issues over time.
Materials Needed
Mild detergent or specialized motorcycle cleaner
Aluminum foil
White vinegar
Chrome polish
Microfiber cloths
Soft-bristle brush
Water hose or bucket of water
Protective gloves (optional)
Removing Rust
Use Aluminum Foil and Vinegar: Tear off a small piece of aluminum foil and dip it in white vinegar. Aluminum foil is softer than chrome and won't scratch it, while the vinegar helps to dissolve rust.
Rub the Rusty Areas: Gently rub the rusted areas with the aluminum foil. The chemical reaction between the vinegar and the rust will help lift the rust from the chrome surface.
Reapply as Necessary: If the foil becomes too deteriorated or the vinegar dries out, use a fresh piece of foil and more vinegar.
Final Inspection And Protection
Inspect for Remaining Rust: Check the chrome parts to ensure all rust has been removed. If necessary, repeat the rust removal process on any remaining spots.
Apply Wax (Optional): For added protection, you can apply a layer of automotive wax to the chrome surfaces. This helps to protect against future rust and makes future cleaning easier.
Buff Again: Buff the waxed surfaces with a clean cloth to achieve a glossy finish.
By following these steps, you can effectively remove rust from your motorcycle's chrome and restore its shine.
ADDITIONAL TIPS FOR MAINTAINING YOUR MOTORCYCLE CHROME POLISH
To avoid scratching, remove dirt with liquid cleaner before wiping chrome accessories, and never wipe with shop rags that may contain metal chips or corrosive chemicals.
Do not use harsh abrasives or hard objects to clean or polish chrome. While chrome is tougher than paint, it can be scratched, and excessive polishing can wear through the plating.
Keep chrome exhaust pipes, mufflers, and heat shields clean. When the pipe reaches operating temperature, residue from oil, grease, and fingerprints can discolor the chrome.
Remove boot marks and road tar from chrome exhausts using Harley-Davidson® Boot Mark Remover.
Cover chrome parts while working on your motorcycle to protect them from dropped tools, etc.
Never store chrome parts near swimming pool chemicals, fertilizers, or concrete powder, regardless of whether these items are covered or uncovered, because they can damage the chrome finish.
Related Resources
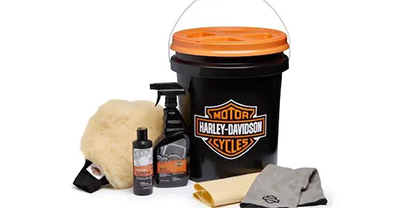
Master the art of motorcycle washing and detailing with our comprehensive guide and discover the dos and don'ts that will keep your bike looking its best.
This guide offers practical tips and strategies to protect your bike from sun damage, preserving its appearance and functionality for years to come.

Explore the functions of the motorcycle helmet shield and a step-by-step approach to cleaning and maintaining it using simple yet effective materials.

Choosing the right motorcycle insurance can be a daunting task—it needs to fit your needs and your lifestyle. Here's what you need to know!

