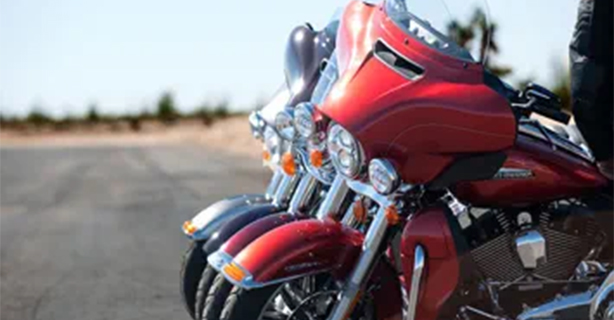
You're at a rally, and there are bikes everywhere. You pull into a big parking lot and assess the situation. Riders have been coming and going all day, and the rows have gotten a little … “irregular.” Bikes are popping out of nowhere, and it's hard to know where to ride. You see a path forward, but it's tight. And crooked. And a little bit challenging.
You start to ride through, but in a moment both your feet are on the ground, and you're pushing slowly ahead. The guy behind you is getting impatient. He hasn't honked (yet), but you can feel his gaze and sense his frustration. And you start to wish you'd never pulled in there.
That's a little how H.O.G.® member Wes Smith, of Albany, Louisiana, used to feel – before he learned the art of riding slowly in a confined area. Now he's not just fearless, he's a champion: the winner of the Police and Civilian Skills Competition (Civilian Division and “Overall Champ”).
“I never could do the slow maneuvers,” he recalls.
But then one day he saw a bunch of police officers riding through cones in a sporting goods store parking lot. It was a police skills riding competition. He was fascinated, and he was hooked. Next thing he knew he was taking a class with the Gulf Coast Motorcycle Institute. Now he's a champion and not afraid of parking lots anymore.
“The difference in my riding is like night and day,” Smith says. “And with training and practice, anyone can learn to do it.”
SLOW RIDING STEPS FOR SUCCESS
Below outlines a multi-step approach to maneuvering slowly in tight spaces.
It starts with riding slowly in a straight line; then learning to balance the clutch, throttle, and rear brake; finding “full lock” turning the handlebar; and finally leaning the bike into the turn while shifting your weight to the outside.
1). Straight And Steady
Start by riding slowly in a straight line, with your head and eyes looking forward (not down at your front tire). Looking down or to your left or right too much can destabilize your head, and that’s going to disrupt what you’re trying to do.
Practice keeping a steady throttle while feathering the clutch and rear brake to keep moving forward at a slow, steady pace. A light touch on the rear brake is key. Try using just your big toe to press the rear brake - just barely touching it.
Once you become proficient at riding slowly in a straight line, without having to “row” on the handlebar or put your feet down, then you’re ready to start turning.
2). Ready, Set, Lock
The next step is riding slowly while turning the bike with the handlebar in the “full lock” position – that is, turned to the left or right as far as the bar will go. The concept of “countersteering” (turning the bar in the opposite direction to initiate a turn) doesn’t apply when you’re traveling below 5-7 mph.
In this case, it’s direct steering so you’re actually going to turn the handlebar in the direction you want to go, just as you would a steering wheel on a car.
The point of this exercise is to get a feel for how far the handlebar will turn and what the limits are in that regard. Maintain a steady speed. If you feel like the bike is going to tip, release the rear brake, ride out of it, and start over.
3). A Human Counterweight
Finally, to decrease your turning radius as much as possible, you’ll have to lean the bike as far as you can. That requires using your body as a “counterweight” through the turn.
At higher speeds, your body naturally leans into the turn with the bike. If you’re doing it properly, your torso essentially stays in line with the frame of the bike. It happens by itself, and you don’t have to think about it too much. At low speeds, the leaning is more deliberate.
Turning the handlebar all the way to one side will result in a smaller turning radius, but the smallest one is when you lean the motorcycle all the way over, as well. If you’ve ever seen a motor officer do this, you’ll see that the motorcycle’s leaned over until the footboard nearly skims the ground, but the rider is leaned away.
For smaller riders, effective counterweighting might require shifting your weight on the seat and moving your butt around a little bit. For most people, however, it may only require keeping your body vertical (to the ground) as the bike moves back and forth beneath you through the turns. This is how Smith approaches those tight turns in competition.
“I don’t move a bit,” he says. “I get myself positioned, and then I don’t want to move around. You want to keep your body set straight up, like a two-by-four almost, and then let the bike work under you.”
PRACTICE RIDING SLOWLY
Taking a course is the best way to learn these skills and become a better rider in close quarters. But whether you take a class or teach yourself, diligent practice is the real key to improving.
An empty parking lot is ideal. If you learn the width of the parking spaces you don’t even have to set up any cones. Most spaces are eight or nine feet wide, so two together make a good target width for a tight U-turn.
Because it can be both mentally and physically draining, it’s best to practice in short stretches, maybe 20 minutes at a time. And take little breaks now and then, both to let your bike cool down and to relax and stretch your body. Shake out your hands. Take a few deep breaths. Let your pulse get closer to normal.
RIDING CHALLENGES DON'T ALWAYS STOP WHEN YOU DO
Successful and enjoyable rides most often involve what you do while your motorcycle is moving. But, similar to riding slowly, coming to a stop and turning off your motorcycle doesn’t mean it’s time to turn off your mind. How you handle your bike while it’s stopped matters, too.
Got a few seconds to kill while waiting at a stop sign or light? Here are a few things to keep your mind occupied.
Putting Your Foot Down
One thing that can trip you up when you’re stopped at an intersection is poor footing. Stop signs and lights are often the site of a slick spot in the middle of the road.
Especially when it’s wet, take care not to casually put your foot down on an oil slick, only to have it slip out from under you, with you and your bike hitting the pavement as a result.
Watch Your Back
It’s also a good idea to keep an eye on what’s happening behind you. Make it a habit to check your mirrors when you stop and be prepared to scoot (safely) out of harm’s way if necessary.
Flash your brake light if you see someone approaching, know your “escape route,” and keep the bike in first gear to make a quick getaway should you need to.
Common Traffic Sensors
Finally, a potentially frustrating “non safety” issue is those traffic sensors at stop lights that must detect the presence of a vehicle before making a light turn green or triggering a left-turn arrow. Sometimes, they’re just not very good at detecting motorcycles.
It’s not hard to find lively, in-depth discussions about this problem on the Internet, but here’s some basic information about how to handle it.
One common misconception is that it’s your motorcycle’s weight, or lack thereof, that causes the problem. But most sensors these days are triggered electromagnetically; that is, they detect metal, not weight. To help make your bike’s presence known, try the following:
Position your motorcycle with both wheels directly over the “cut lines” in the pavement that define the sensor area.
If this doesn’t seem to do the trick, lean your motorcycle slightly (and carefully) toward the center of the sensor area. This increases the amount of your motorcycle the sensor is able to “see.”
Some states have enacted laws that make it legal for motorcyclists to proceed at their own risk, with caution, against the light if the sensor isn’t triggered. But make sure you know your local motorcycle laws before doing this!
Parking Your Motorcycle
Even the most experienced riders can occasionally find themselves in an unfortunate (and embarrassing!) situation due to a momentary lapse of concentration while parking.
What's A Parking Puck?
One easy mistake is not noticing when the parking surface is too soft to support the weight of your motorcycle on its sidestand. This may happen in a dirt or gravel parking lot, a grass field (in both cases, especially when wet), or, very commonly, on an asphalt lot on a warm day, especially when the asphalt is fresh.
Many wise and experienced riders carry some form of parking “puck” with them at all times for just such situations. The idea is to spread the motorcycle’s weight over a wider area to prevent the sidestand from sinking into the parking surface – leading to an unpleasant surprise for the returning rider. This can be accomplished in many ways.
Commercial pucks made of plastic or other stiff material are readily available and generally inexpensive. A small square of plywood – even a very thin piece – will easily do the trick.
If you don’t have either of these, a number of other things will do in a pinch. A flattened aluminum beverage can is a common puck substitute. A flat rock, or even just the right stick, will often do nicely. The key is just to get something hard, flat, and stable underneath the sidestand to prevent unexpected “sinkage.”
Parking On A Downhill Slope
Another important consideration when parking is slope. One common “rookie mistake” is pulling happily into a prime parking space near the restaurant door only to realize after your lunch that you’re incapable of pushing your bike backward up the slope you didn’t realize you parked on. Again, the key here is simply awareness.
Pay attention when you park: If the spot slopes away from you, swing around and back your bike in. That way, you’ll have the full power of your bike’s awesome V-twin engine—instead of just your less-awesome leg power—to get you back up that little hill.
Slopes also matter when they tilt sideways. If the ground to the left of your motorcycle is lower than to the right, it may result in too much lean to keep your bike upright. (This is especially important if the ground is soft or wet, as previously discussed.)
In this case, as with the downhill situation, you may be better off backing in to keep the sidestand on the high side. Take care, however, not to leave your bike so vertical that a gentle breeze (or careless child) could knock it over. If the slope is too steep to park safely either way, find another spot.
Parallel Parking
Whether you’re parking in parallel or in a “head-in” spot, any time you park your motorcycle in a spot meant for cars, visibility is an important concern. That is, park your bike in such a way that the space doesn’t look empty to an approaching car. In a head-in spot, don’t pull all the way to the front of the spot (unless you’re sharing the spot with other motorcycles). Make sure a driver eyeing that same spot later will see your bike before it’s too late.
Take a similar approach when parking in a spot along the curb. Don’t park “parallel,” as you would in a car. Instead, back your motorcycle into the space at a fairly sharp angle. Not quite perpendicular; maybe 45 to 60 degrees. Enough to give you a good angle to re-enter the traffic flow when the time comes and make your bike more visible to drivers.
Walking Your Bike
Hitting the stop switch in a parking lot doesn’t necessarily mean you’re done moving your bike. And walking your bike presents a prime opportunity to drop it. Fortunately, the skills required for keeping your ride upright in this situation are fairly basic.
The primary concern is keeping the frame and wheels as upright and vertical as possible. At speed, your motorcycle leans when you turn. When stopped, it doesn’t take much of a lean before you reach the “tipping point” (depending on how strong you are). Take care to steer with your arms and hands using the handlebars, not by shifting your weight or pushing the motorcycle with your legs or body.
Take your time: Slow and steady will always win this race. And if you get yourself into a tricky spot, such as the low end of a slope, don’t be embarrassed to ask your riding companion to give you a gentle (and steady) boost.
These skills are really for navigating congestion off-street. When you get to a rally and the street’s closed and there are a lot of moving motorcycles, or you’re riding into a crowded gas station. Any time you’re leaving the public roadway but still having to ride in a very congested and complex situation, that’s where it’s helpful.
A version of this post appeared in HOG® magazine.
Related Links:
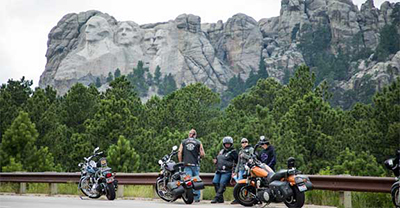
The Sturgis Motorcycle Rally, in its 85th year, is the world’s top destination for motorcycle enthusiasts. Discover everything you need to know about Bike Week.
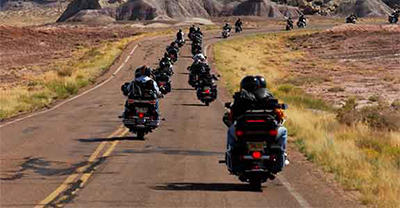
Riding in a group presents special challenges. These basic guidelines and group riding tips can help make sure your next outing is safe and enjoyable for all.
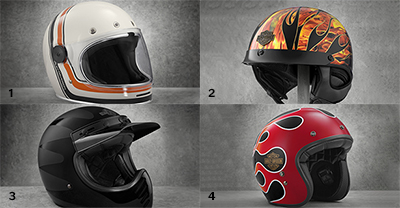
A motorcycle helmet is arguably the single most important piece of safety gear. Discover the nuances between helmet types and tips for finding the right size.

